Working With the Ender 3 Scene
⚠ Please note: this is slightly more advanced than the GCode loading discussed before. Please do not start here. Please read and test Your First GCode Import and Scaling and Positioning before you start with this section.
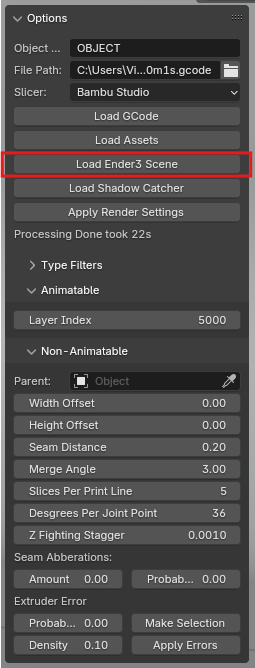
- From the side panel click
Load Ender 3 Scene:
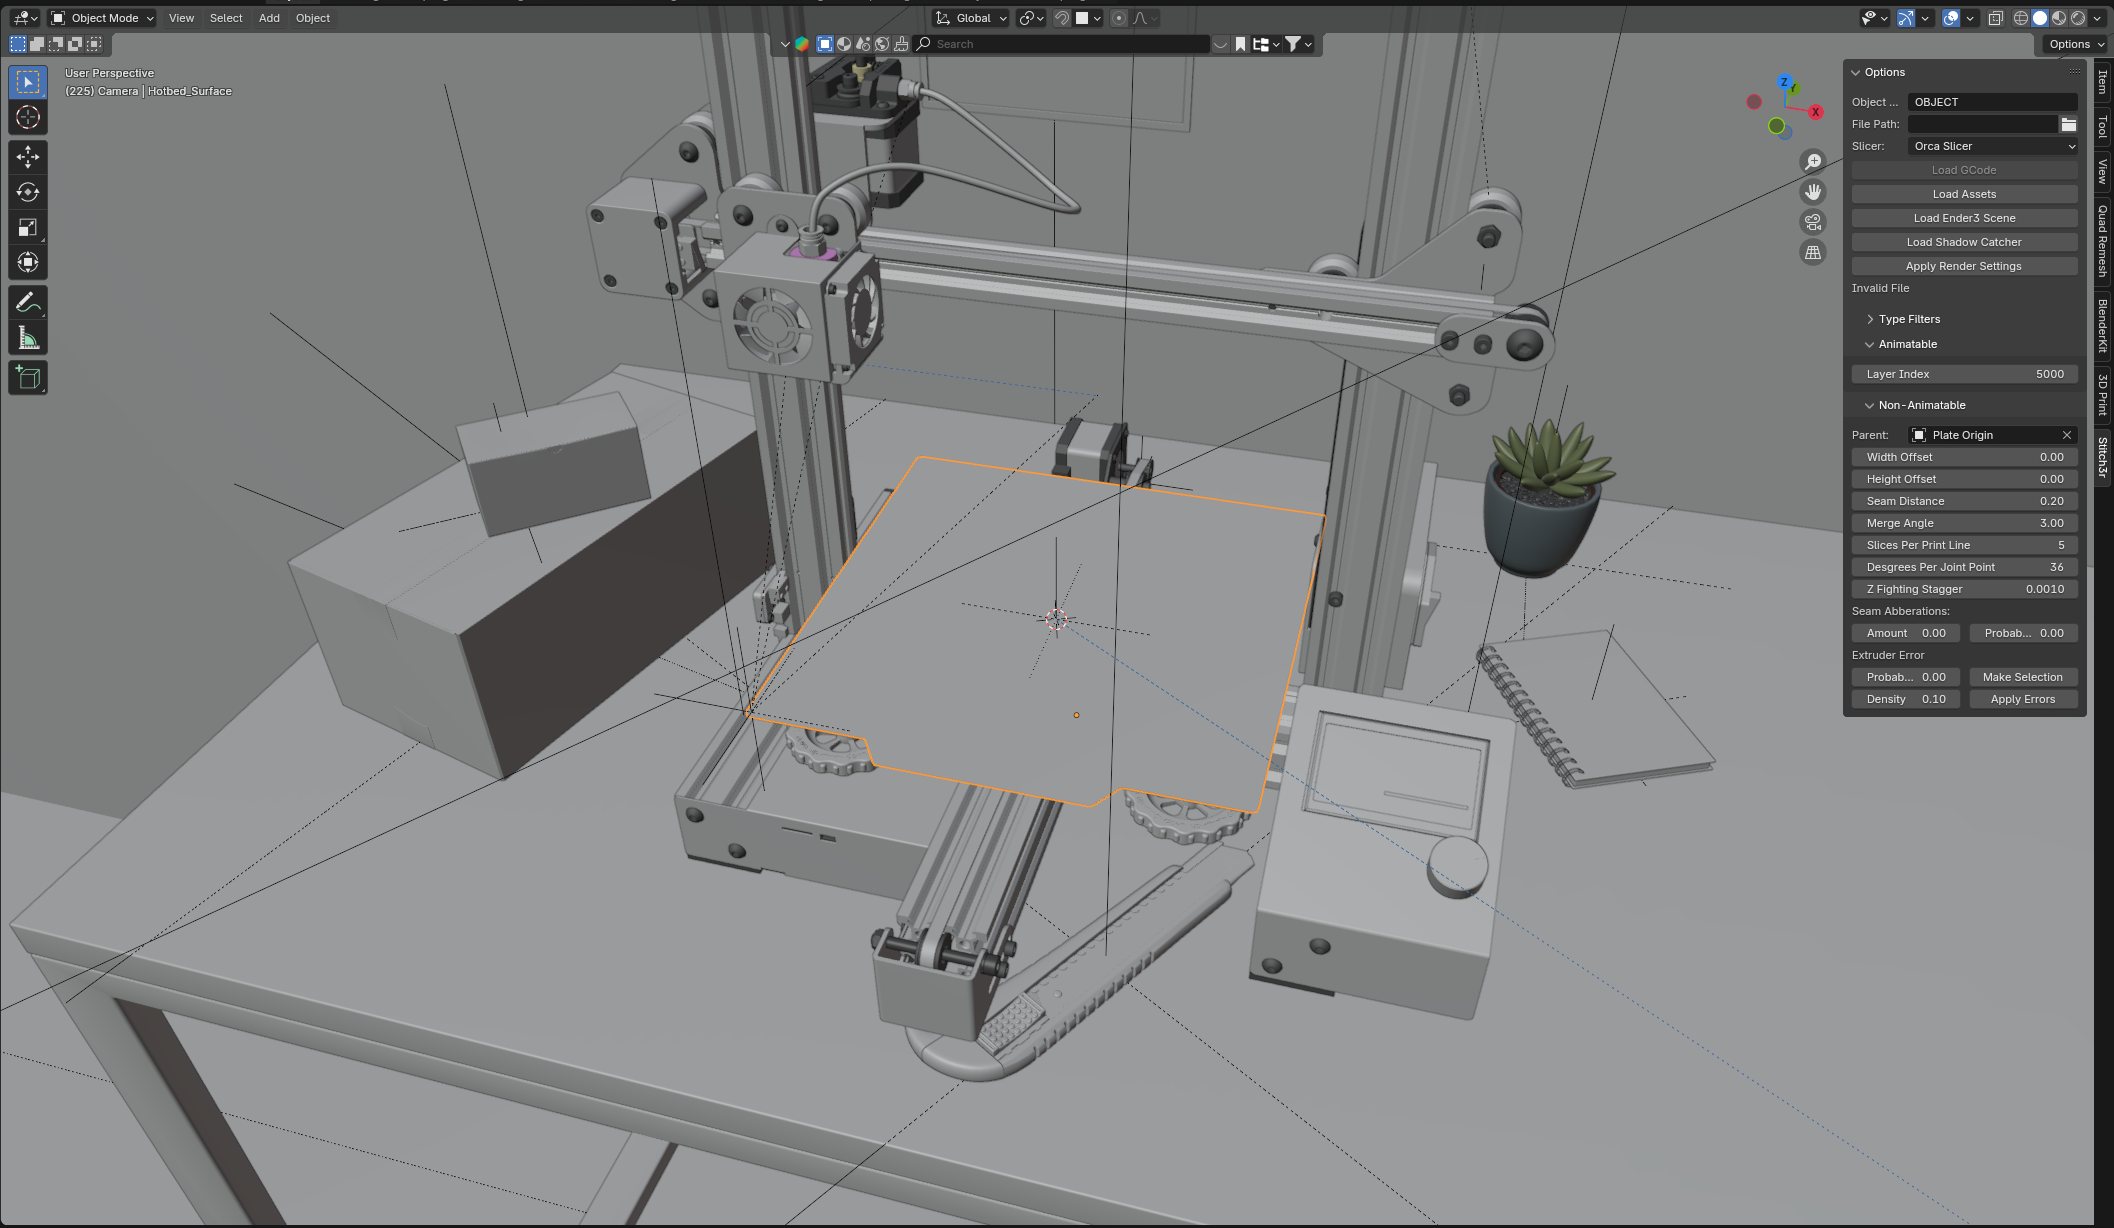
- This should load the scene for you with everything set up:

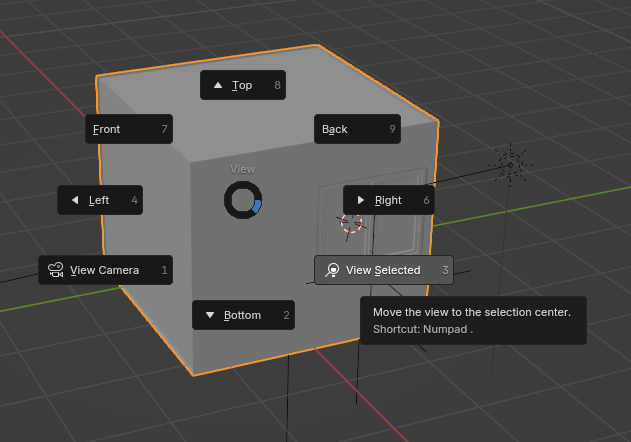
- Zoom into the small cube and find the printer model inside. You should know a little bit about navigation in blender but you can click on any object and the hit the
~key and selectView Selectedto bring object to your center of view:
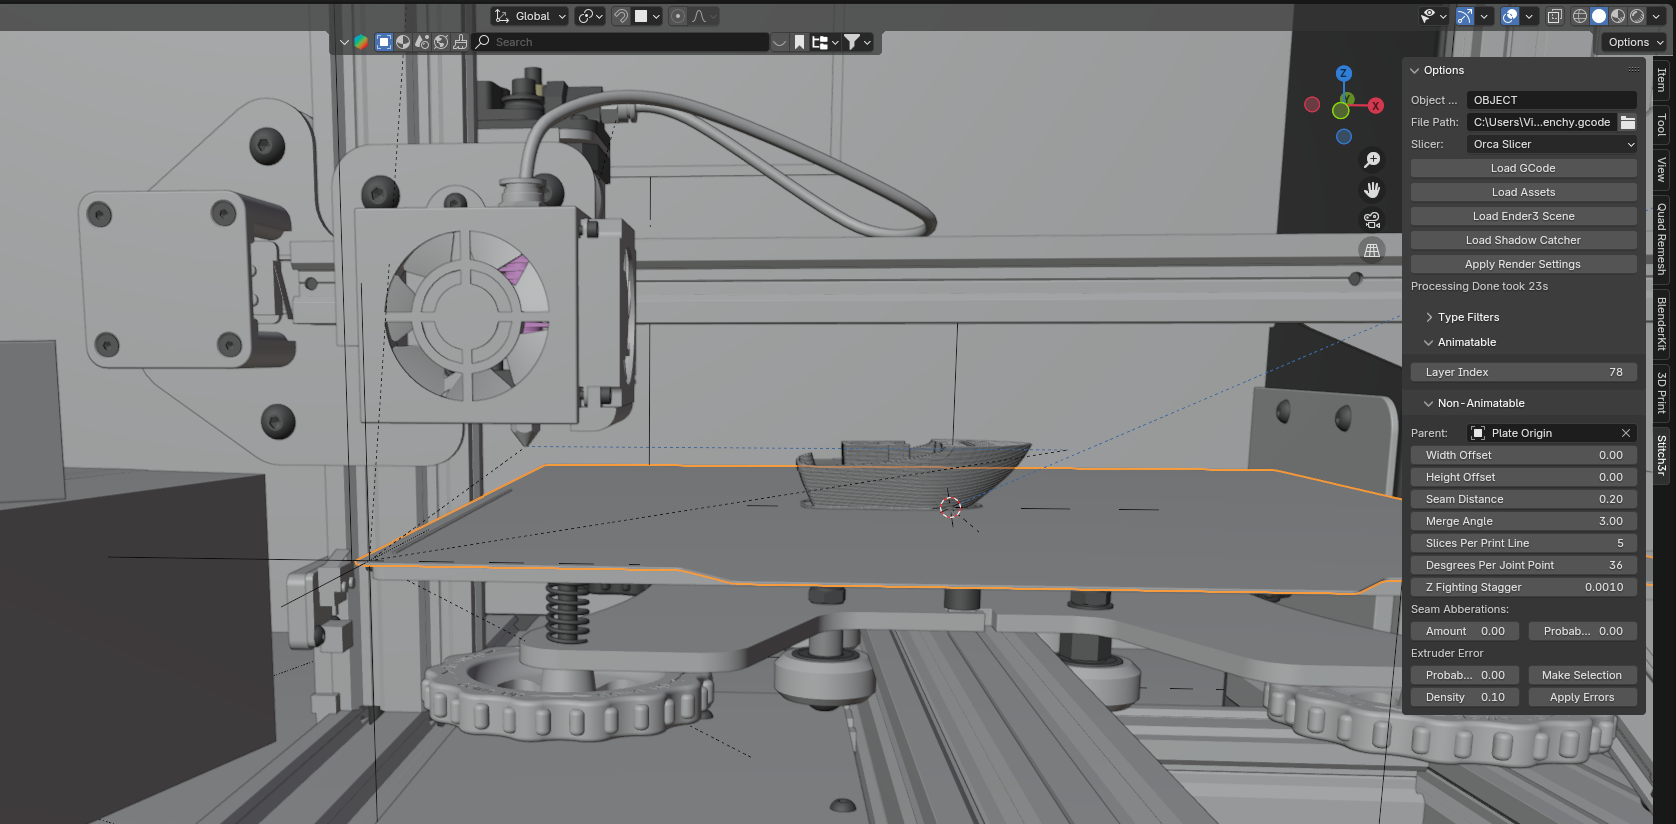
- Once you zoom in on the printer, you’ll see the scene set up for you:
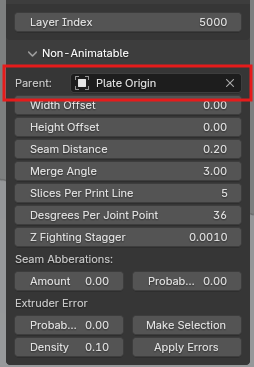
- Do not change the
Parentproperty in the add-on window. This does a lot of the heavy lifting for this model.
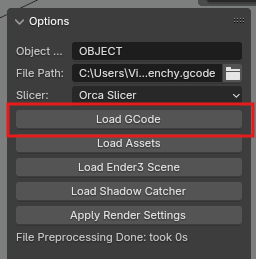
- The rest of the process is the same as described in Your First GCode Import. Just find your GCode file (Please find a GCode that fits withing the bounds of Ender 3 print volume or it will just give funky results) and click
Load GCode:
- Once the model is loaded the nozzle will snap to the top layer automatically. Yes, this works with variable layer height as well:
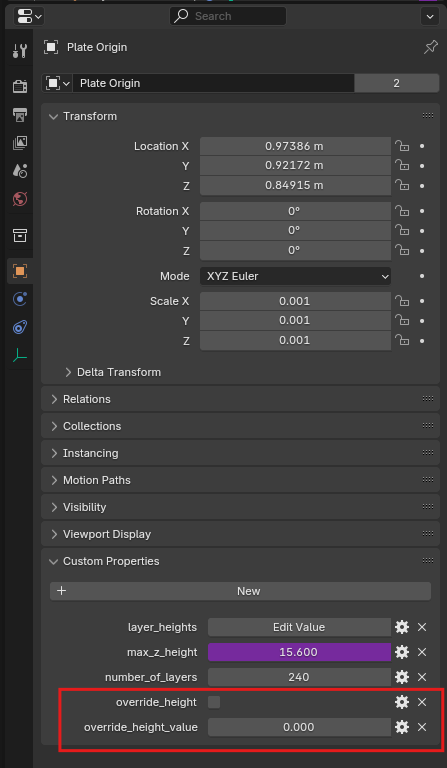
- You can override the nozzle height if you select the
Plate Originempty object:
- And then go to
Object > Custom Propertiesin thePropertieswindow:
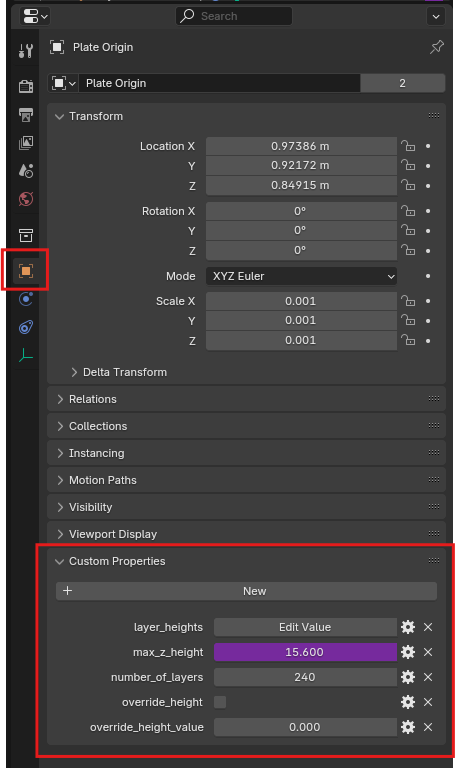
- Enable
override_heightand the pick whatever height you will like inoverride_height_value:
- And then go to
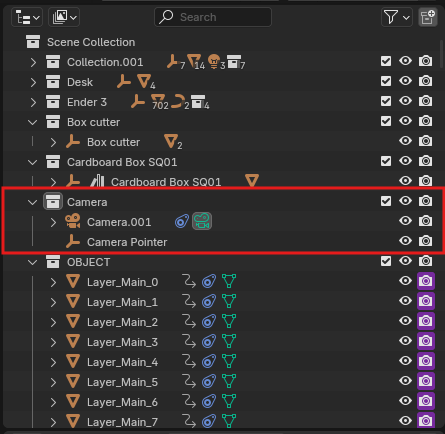
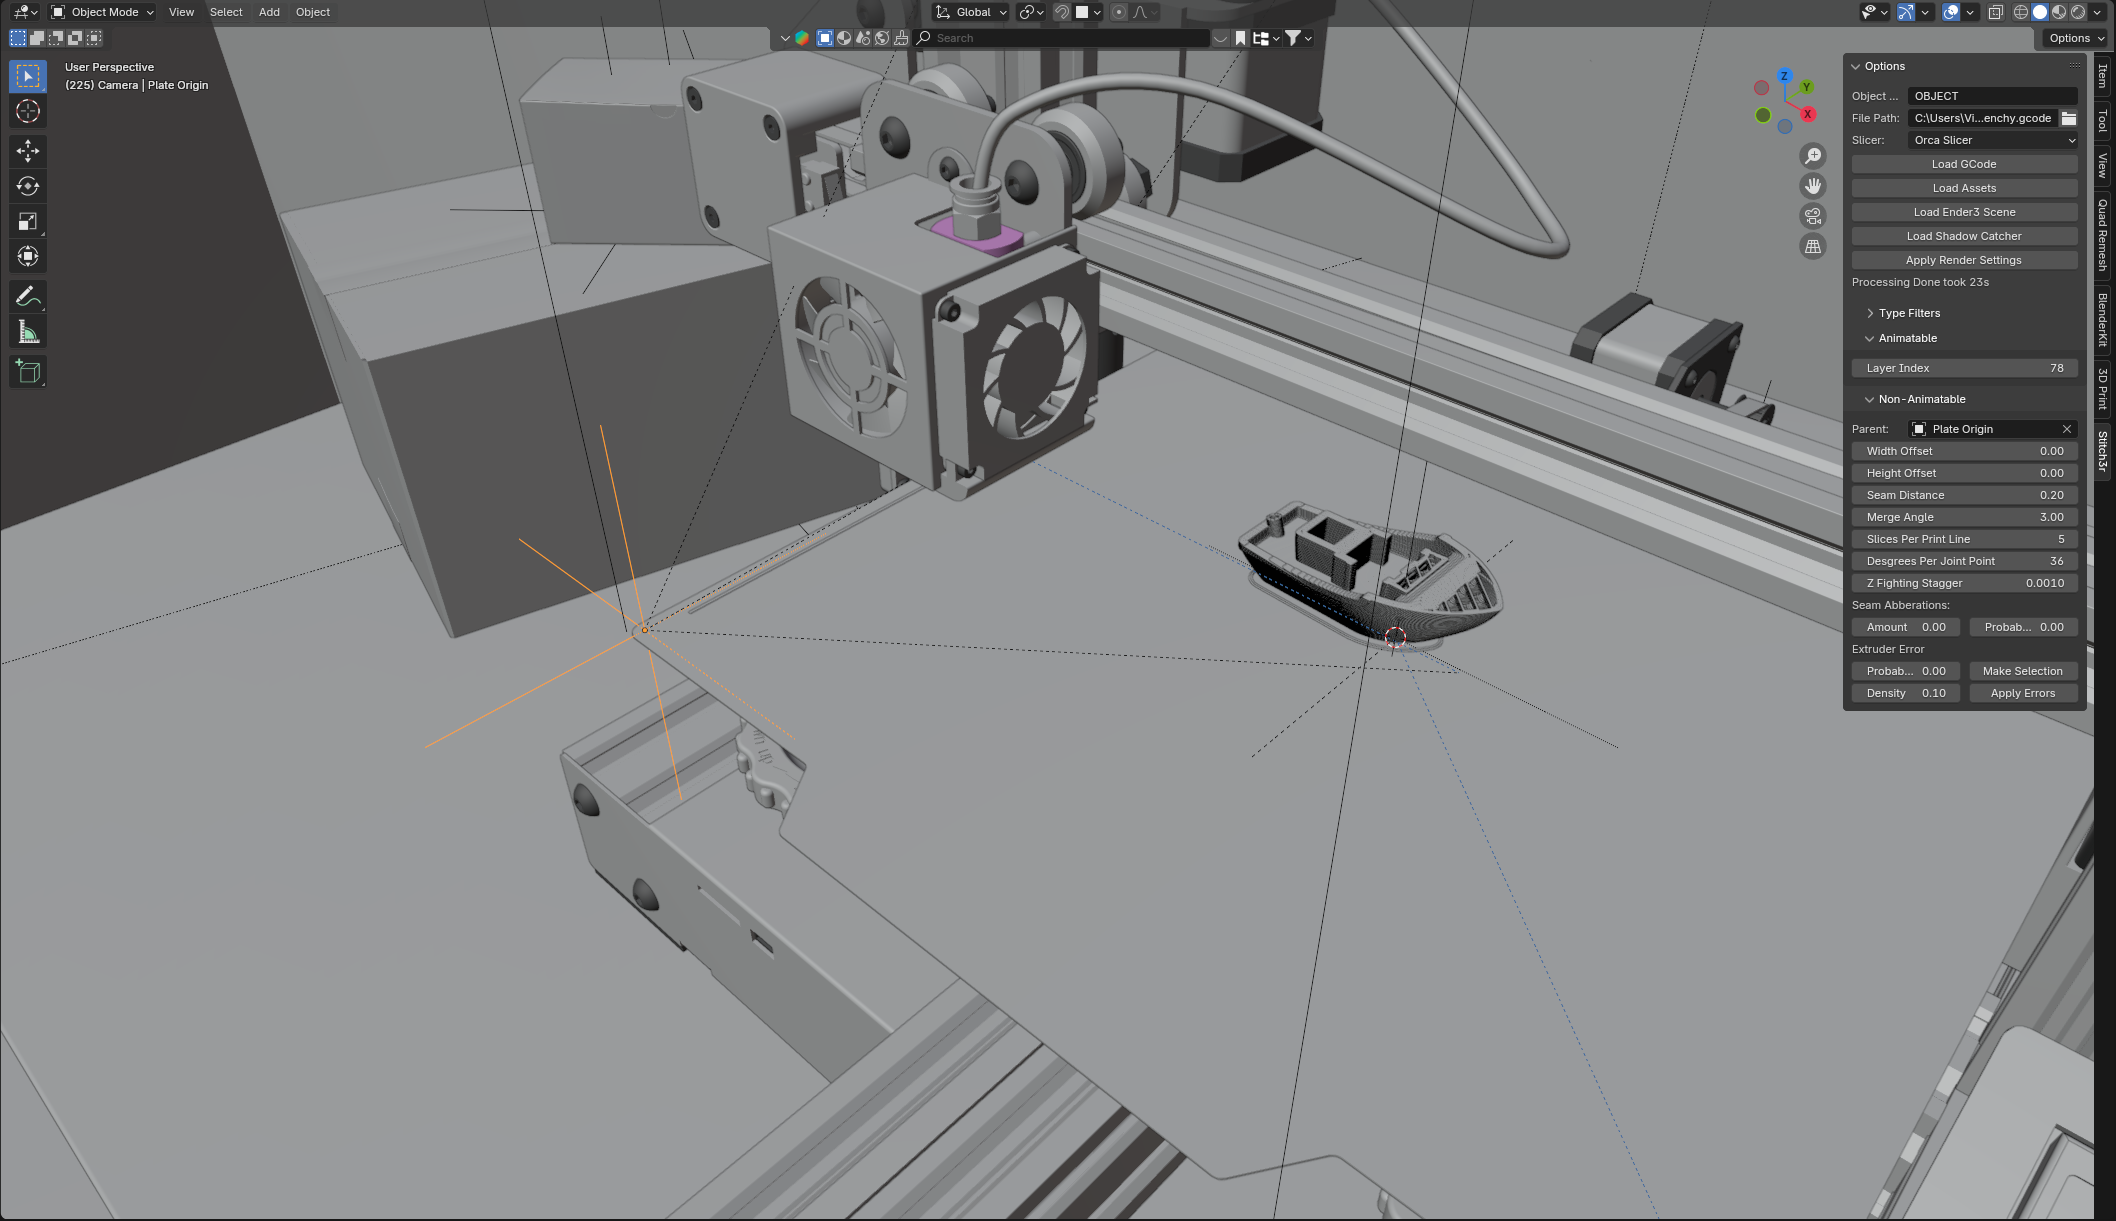
- There is a camera in the collection named
Cameraand an empty object calledCamera Pointer. The Camera always points towards the empty to make it easier for you to point it at the print: